
Exercise 1: Quick Studies
Two-Minute Studies
For the first part of this exercise, I decided to work in charcoal again due to its flexibility, ability to move quickly and my growing confidence in the medium overall.
I began the exercise by asking a friend to pose for two minutes (measured by the stopwatch on my mobile phone), before changing positions for another two minutes.

1 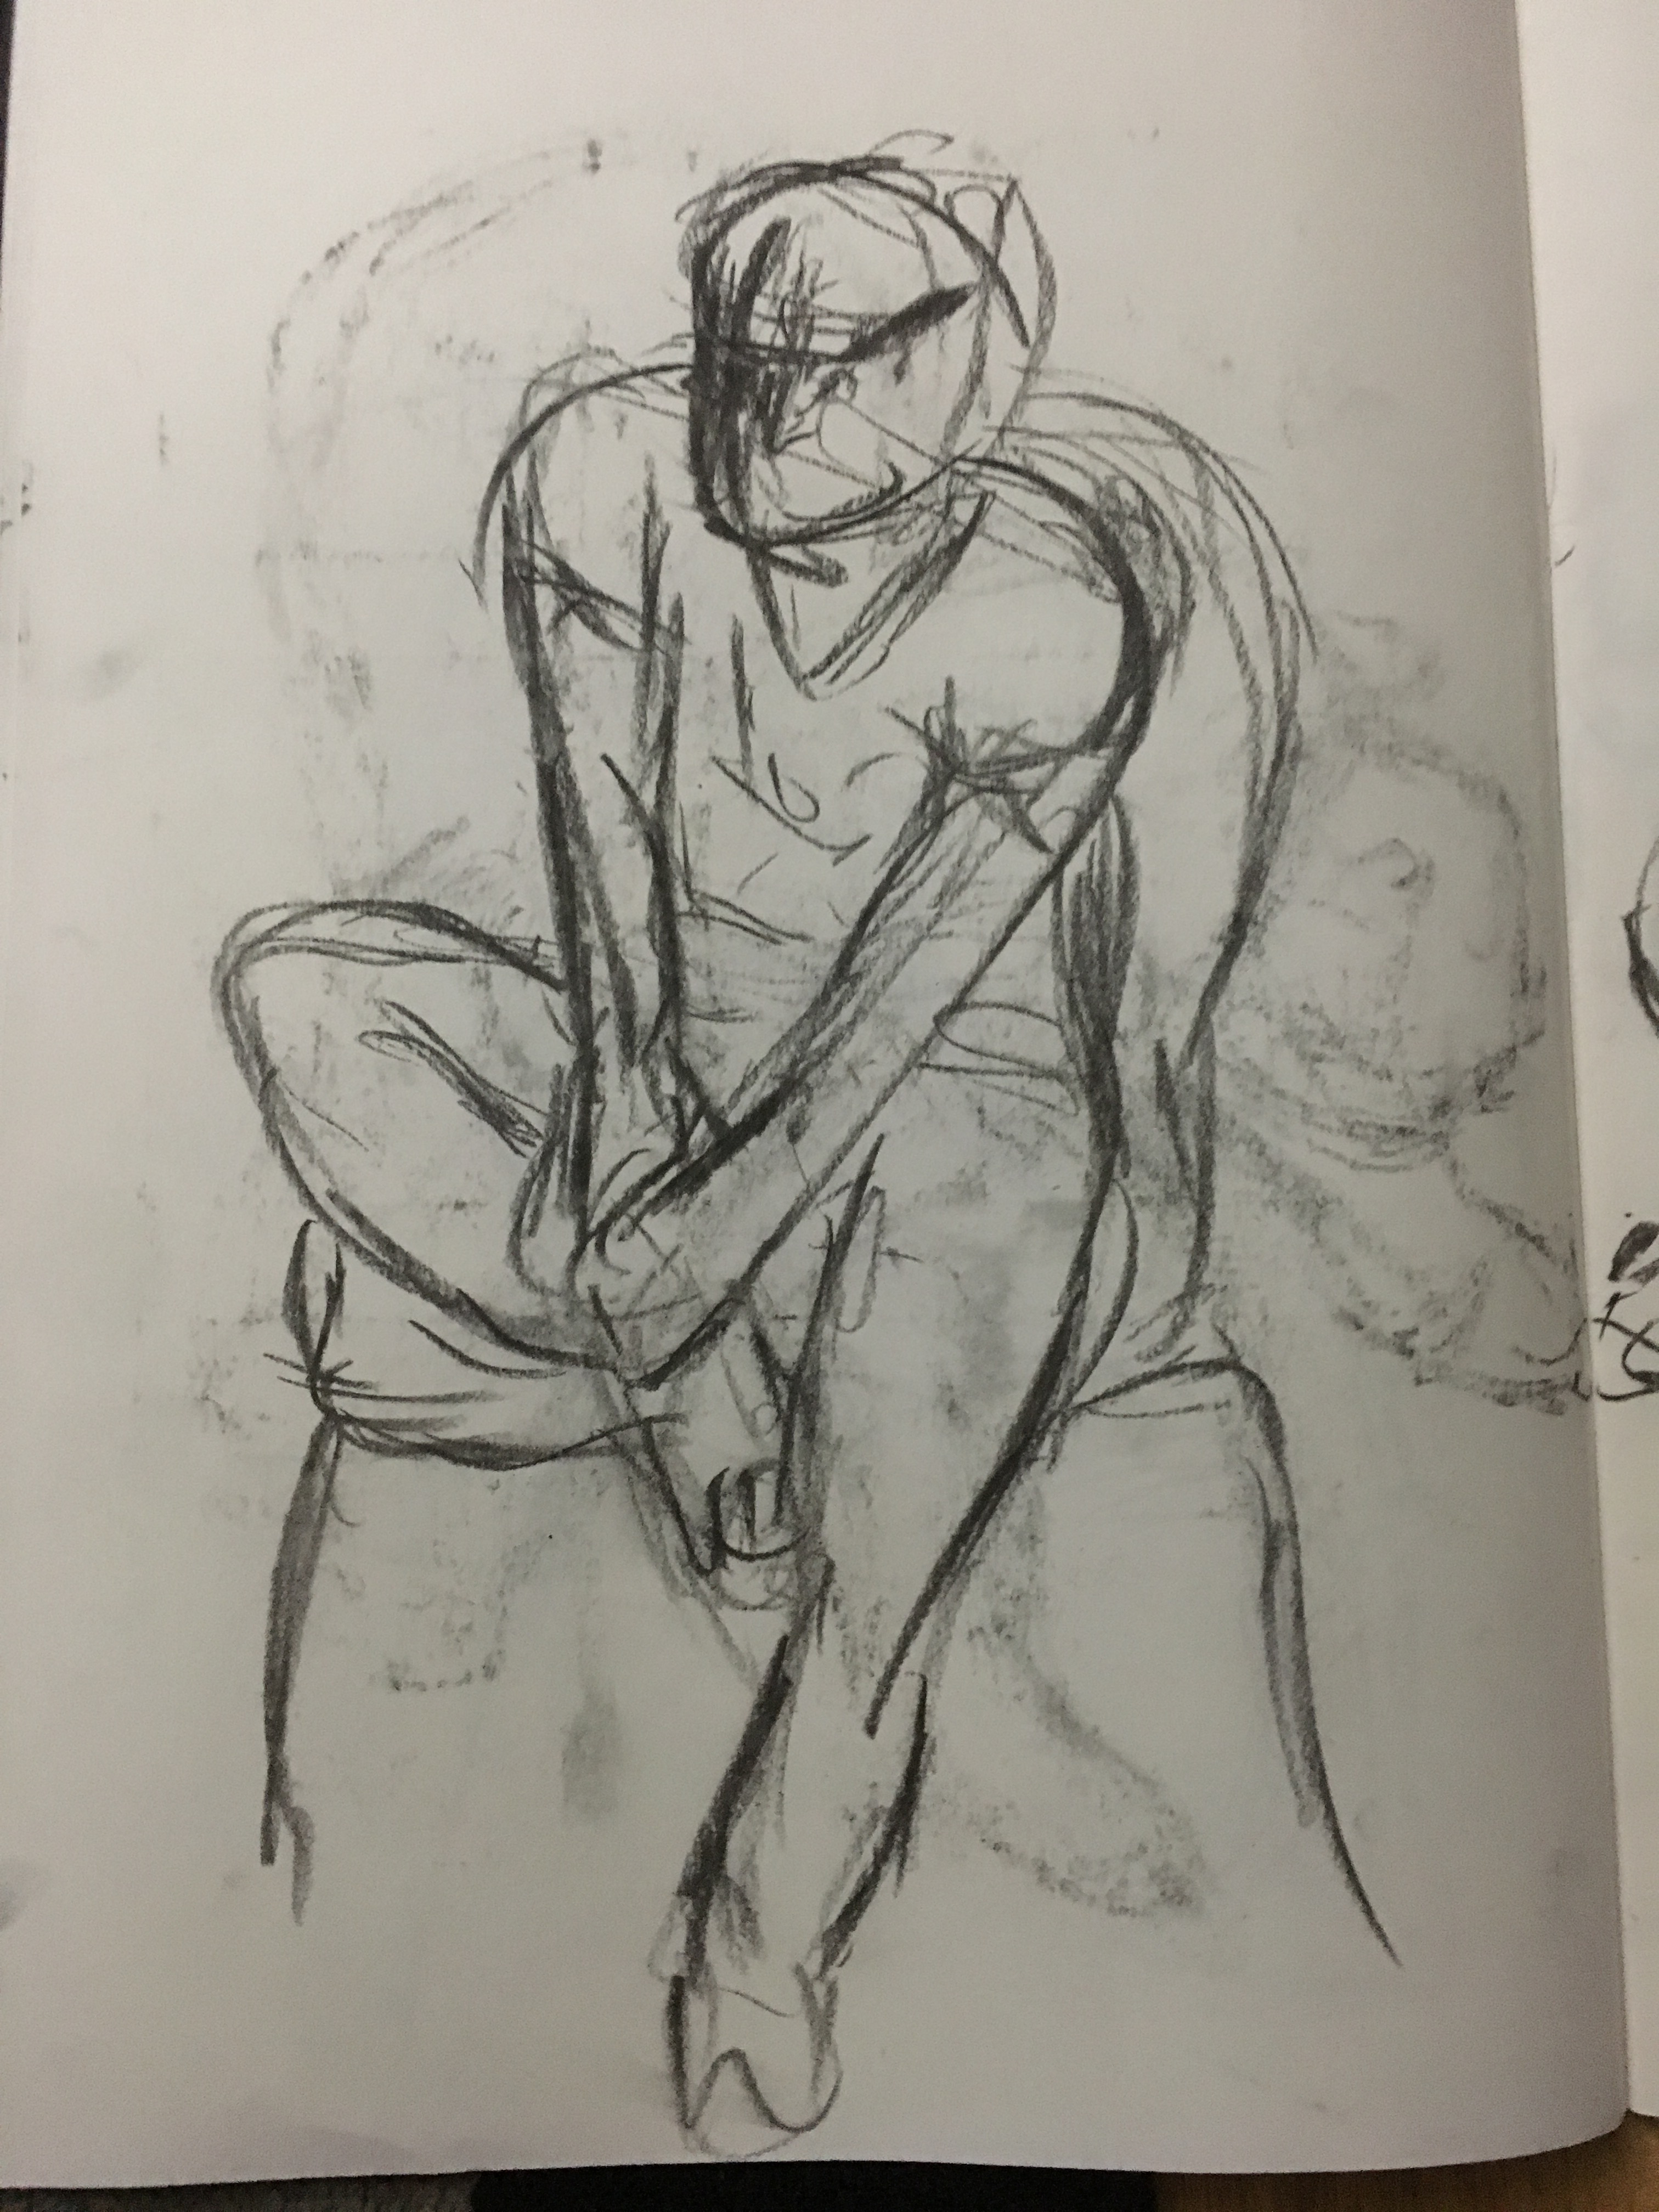
2 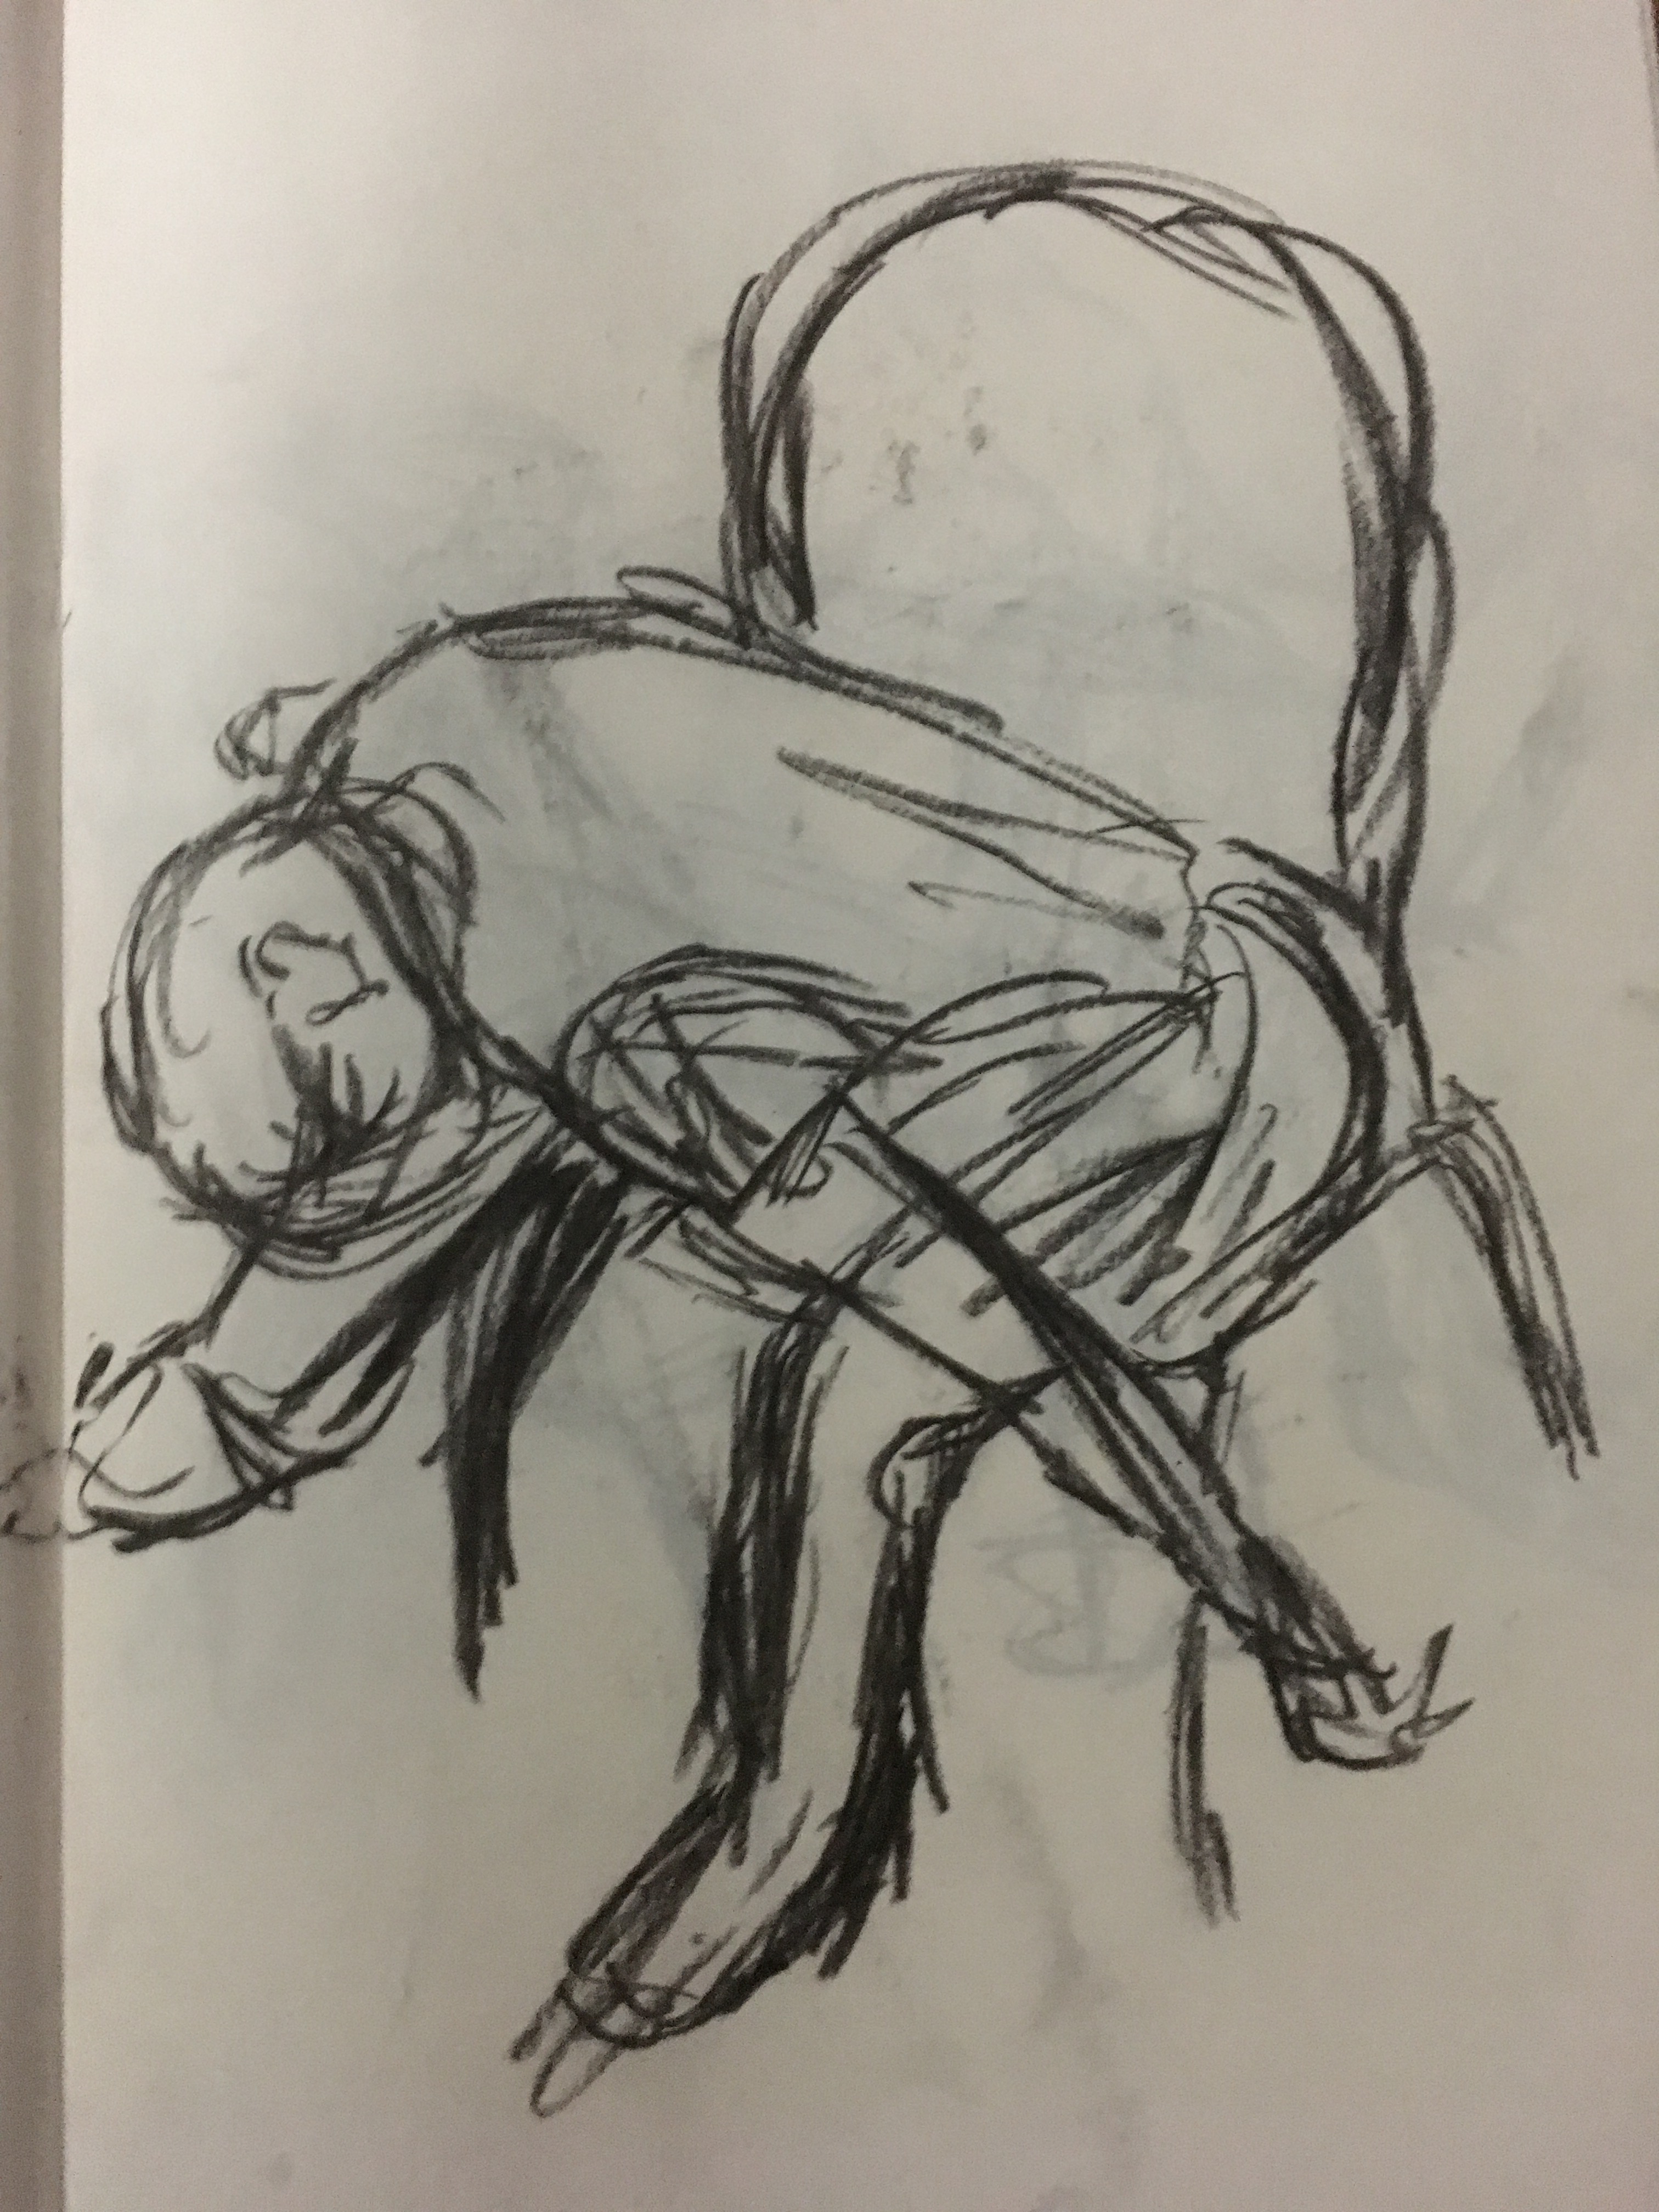
3 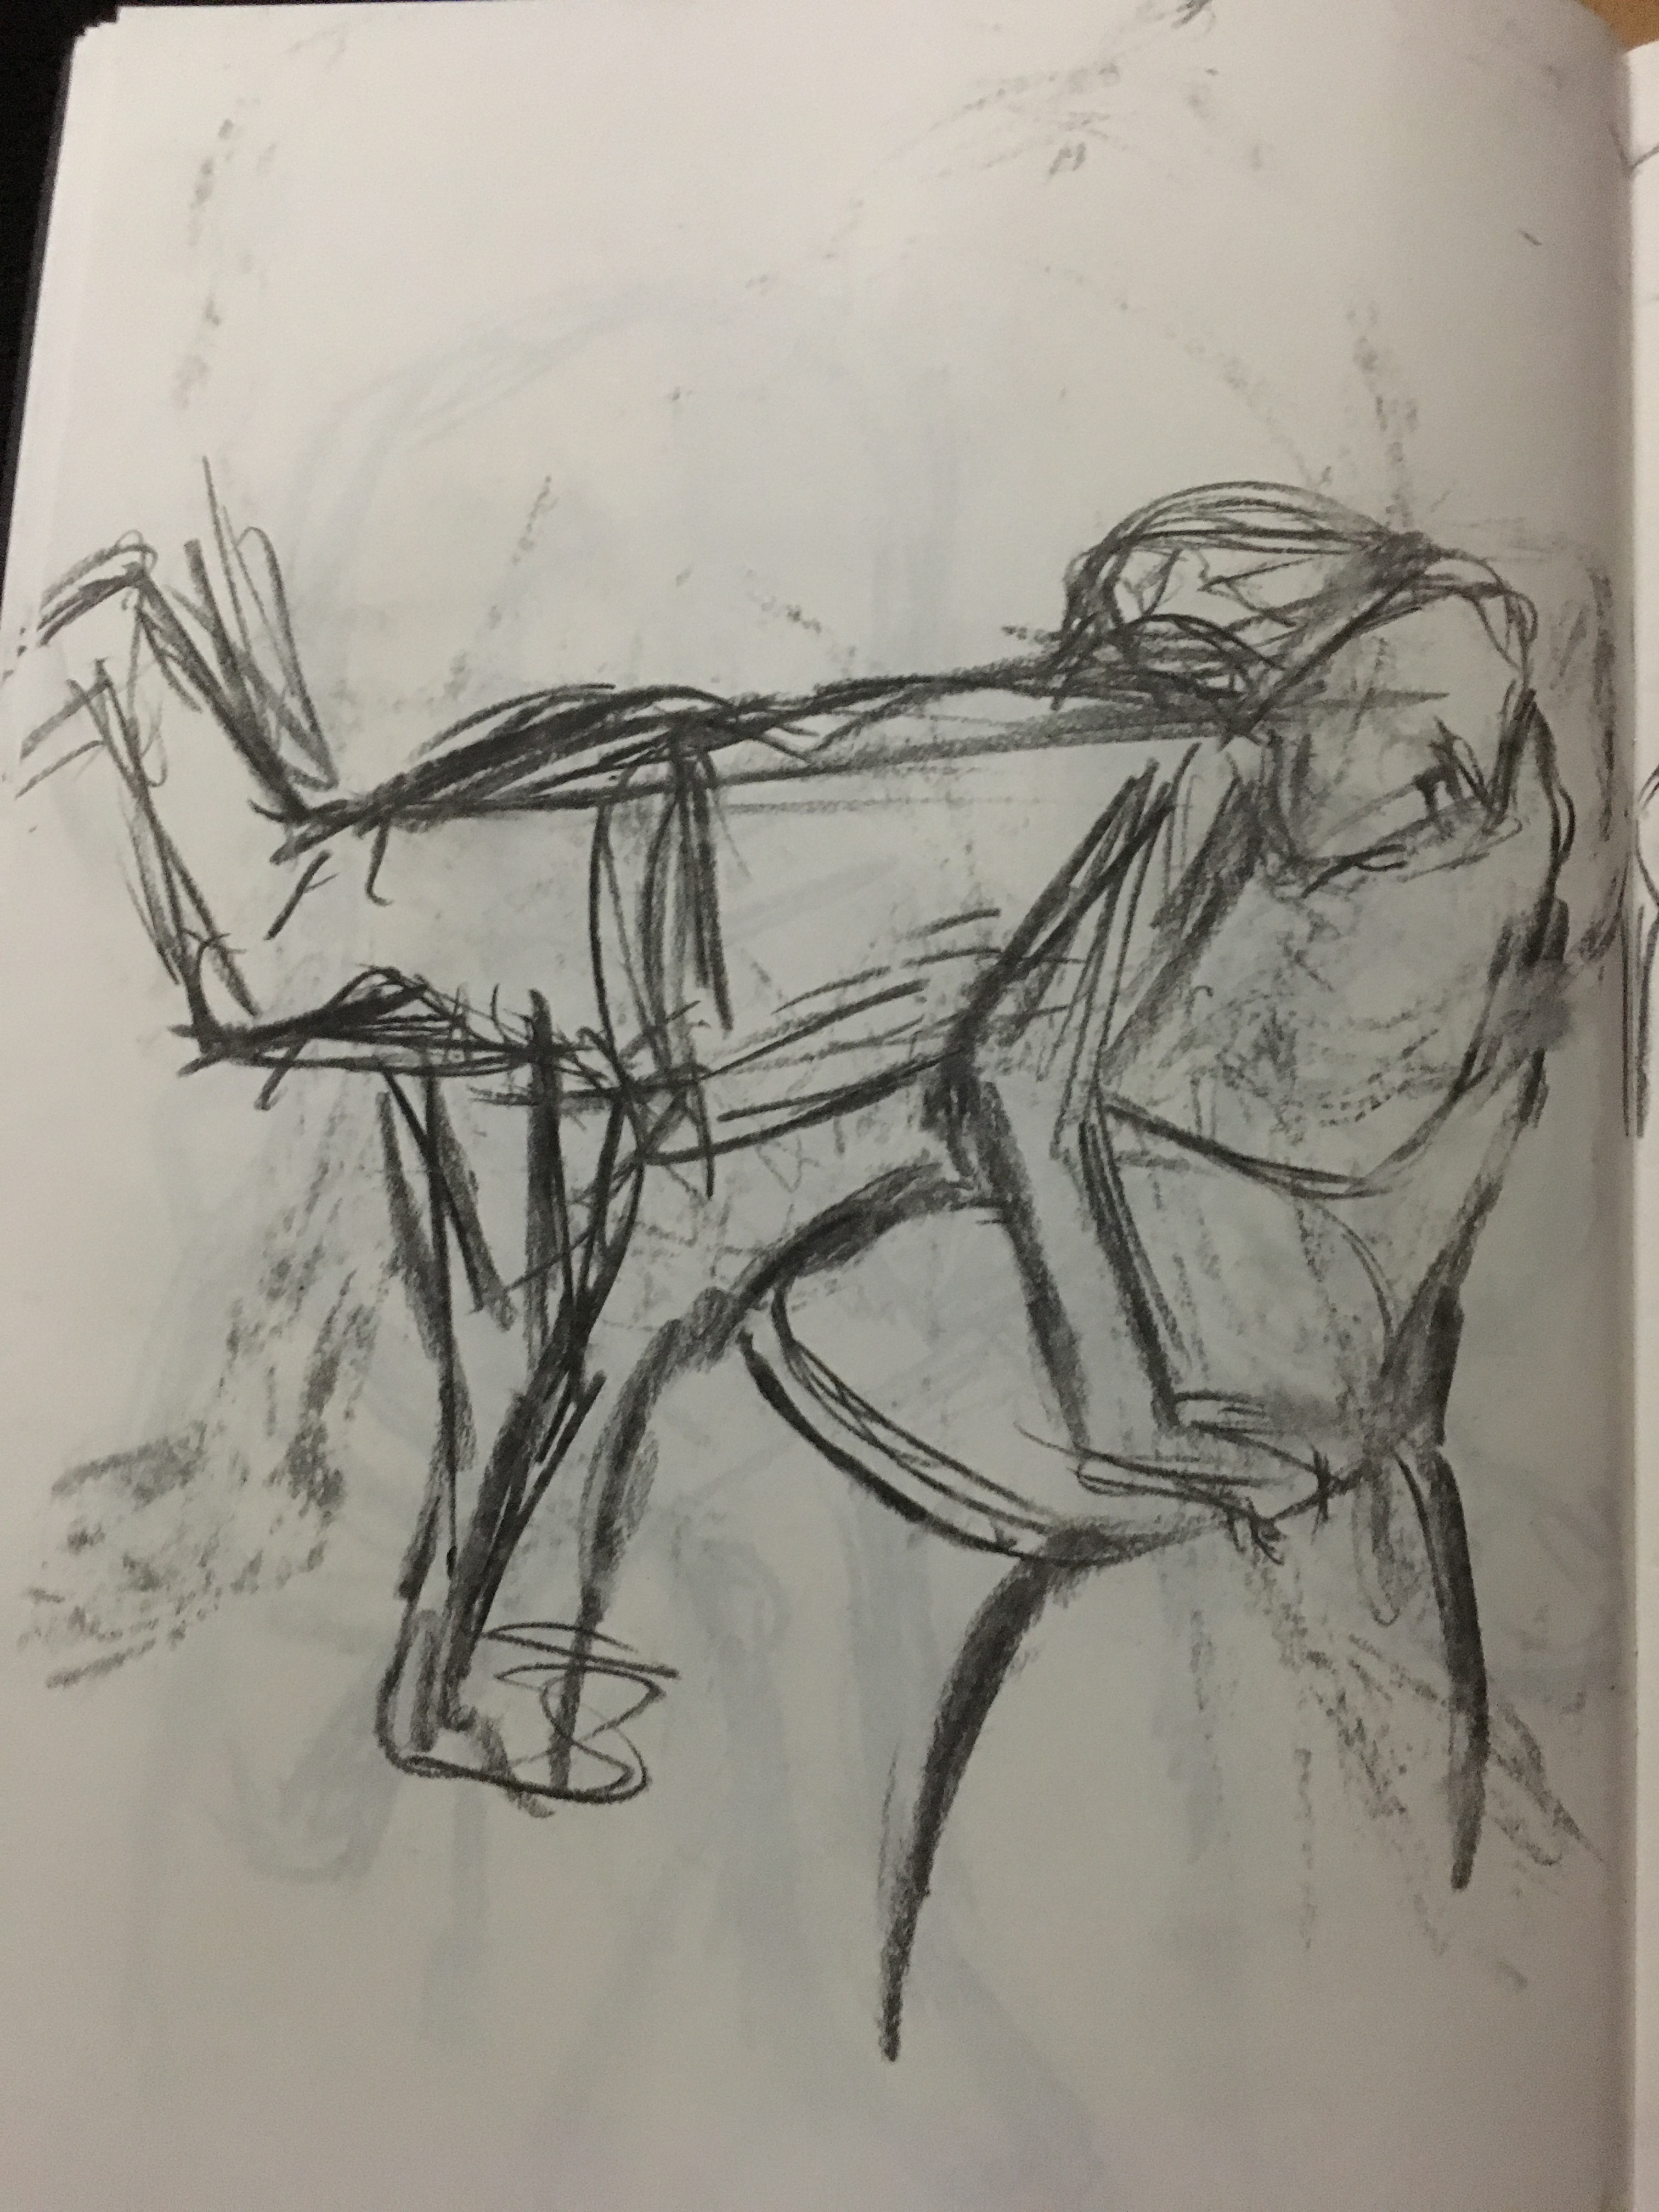
4 
5
During this process, I tried to think how short a time I actually had and how much information I wished to include. I decided omitting any details was my best way of getting as full a picture as possible within the time-frame. I also decided that including the chair the model was leaning on was important to help ground her and explain how she was capable of being in the position she was in at that time.
I began each sketch by drawing a simple line through the middle of what would become the body, extending it down, up and across for the arms and legs, depending on their positions. I then moved on to drawing basic shapes for the different parts of the body , after which I worked on building the actual shape of the outline I could see, having decided to learn from my error with the towel in the first exercise. I also – whilst admittedly only very quickly – tried to bear in mind the model’s bone structure and muscle movements to help me measure things out as accurately as I could in the short time available.
I thoroughly enjoyed this process – possibly more than anything I have done so far in this course! I was able to be extremely cathartic and focussed whilst having almost no interest in the finer details seen at all. I think this will be extremely useful in the future for eliminating unnecessary detail, since detail really is not one of my strongest points, nor is it as enjoyable.
Whilst I think my first study is definitely the more ‘pretty’ and finished of the five due to the structure and – whilst still expressive – more controlled and tamed lines, I think it is clear to see from the progression of the sketches that I became looser and less controlled with each exercise, trying to include as much information as possible.
My least favourite sketch to create was the fourth as I found this pose rather difficult to measure as accurately as the rest, not to mention the model’s raised leg tiring as the time progressed and lowering closer to the ground, which then changed the model’s whole pose; the twist in the torso and the change in direction of the head. Whilst this is my least favourite and the one I would deem the weakest, I was somewhat pleased with the result due to it including some movement and my ability to keep working through that. I think this will come in handy when I reach the crowd and energy / movement exercises.
Ten-Minute Studies
For the first of my ten-minute sketches, I stayed with charcoal again to avoid the change in medium throwing me off slightly and allowing my focus to rest on how I would approach this task.
For this exercise, I admit I used a photograph from a book I have bought which is full of poses for artists as I did not have the opportunity to draw someone from real life at the time and did not want to waste too much of my allotted time for this Part of the course on the exercises since they are meant to be stepping stones to the final piece. I know my tutor has said that working from photographs has stifled me in the past, but I thought this would be ok for some of the longer studies to avoid too much time passing.
I began by drawing the line with its branches for the torso and limbs, then drew an oval for the head. From there, I drew the rest of the shapes in the body and then the outline as seen. At this point, I had reached a point where I had finished on the two-minute studies and I admit, I was a little dumbfounded as to where to go from here. I decided my next step was to include the darkness of the hair and the areas of tone I could see. I decided ten minutes was not long enough to remove the outline of the figure by blending it in, so left this be. From there, I began to focus on the facial features, which I had not been able to do before, besides an indication of the direction the face was facing. I was still working rather quickly on the details of the face, but wanted to get the direction in which the model’s eyes were looking. Finally, I added a darker layer to the model’s hair to try and consider my tutor’s comments regarding layering to create depth. It was at this time that my timer went off and I had to down my charcoal.

When I initially looked at the first ten-minute sketch, I was rather disappointed with the rather juvenile looking outcome; the outline was too bold – too much of a heavy hand! – the right arm’s weight was not even to that of the left (as was the weight of the left leg compared to that of the right), the head was rather too large for the rest of the body and the facial features too forced. Finally, I had spent too much time focussing on the finer details (for a change!) and had run out of time with the lower half of the model not looking half as complete as the top.
All this disappointment aside, I was able to see some successes within the sketch; the model’s gaze appears rather convincing to me and suits the direction and flow of the model’s general pose, the hair does hold some depth and shows a slight curl (though I think this could have been emphasised more). I think the seated position on the stool is rather believable too and the areas of tonal value work well in showing such things as the armpit and depth of the forearms.
Bearing in mind my over-interested approach to the details of the previous sketch, I decided to now swap to oil pastel since this was also a medium which is flexible and also one I am rather comfortable with. However, instead of using black for this sketch, I decided to use a brown oil pastel. My reasoning for doing so was because I had thought long and hard about my tutor’s comments in relation to my lack of skill with colour, yet improvements in monotone and decided to try and work on improving my use of colour without *actually* working using colour.
I decided to catch my husband unawares in a natural pose (he was fine when I told him about it afterwards! haha!) whilst sitting on the settee on his phone whilst, again, timing myself on my phone.
Again, I began with a very, very light layer of the oil pastel to create the basic shapes seen and slowly built upon this in the same ways I had for the previous exercises. Once again, I found I had reached the same level as the two-minute studies rather quickly but, having learned from the previous sketch, decided to work more on the blocks of tone instead of the finer details. I also included some of the settee where he was sitting to help ground him and create a bit of the backstory. I kept layering the oil pastel and even indicated the facial features with just the patches of tone until the timer went off and it was time for me to stop.

I am rather pleased with this end result as I, firstly, I was actually able to bring it to a stage I felt it was quite ‘finished’ looking and, secondly, I think I have managed to measure the proportions rather well considering there was only a limited amount of measuring due to time constraints. I am really happy with the contrasts in the tonal areas and how by purely using patches of tone, I was able to create a sense of the direction in which the eyes were looking (at the phone). It just so happened that the lighting fell from our floor lamp to his right, so there was quite a few areas of really light areas and also very dark patches of shadow.
Doing this has really helped me understand the comments my tutor has made regarding eliminating unnecessary information by giving me the opportunity to work fast to fit in what I could in a short amount of time. Whilst I think the two-minute studies will be good to help choose interesting viewpoints and compositions, I think this method will be helpful to assist in working out the main areas of lighter and darker patches of tone within my chosen viewpoint.
Exercise 2: A Longer Study
Again, I had to rely on a photograph in the book I had bought to assist me with this exercise; I did not have time to get to a life class at the time (though I intend to do so when I am further into this Part of the course and have a little more understanding and I did not want to waste any of the invaluable time without practising more first) and also it has become really apparent to me just how little spare time I actually have to be able to fit such long studies in and how few people are willing to assist by modelling for you (even fully dressed!).
I set my timer again, but for one hour this time. Due to the fact I had an hour for this exercise, I decided to use pencil to draw out the central line of the model, the head, torso and limbs before committing myself with my pen. I also decided to use a black pen for this piece as I really enjoy working on a finer scale with this medium and feel as though I have the best control over it as opposed to the flexible fluidity of the charcoal and oil pastel.

Once I had the initial shapes in place, I began to draw the outline in with my pen. I then built up the darkest areas; the section where the buttocks meet the legs, the hair and the shadow around the model.
From there, I then focussed myself on adding in the lighter areas of shadow and creating the definition of the muscles and bones underneath the model’s skin. I stayed rather expressive with regard to the model’s hair, however, I tried to be much lighter for the shadows on the model.

To look at, I am rather pleased with the piece as a whole; I think my measurements are rather even generally and equal on both sides and I think the shadows on the body as a whole are rather convincing and believable.
I am, however, slightly disappointed with the outlining shadows as I think the model does appear to be floating in midair. I think, had I had more time, I would have introduced more of a background (whilst the model was actually standing against a wall, I think I could have made it appear as though she were on a bed or even emphasised the wall in some way – perhaps by an indication of some brickwork? There is also too much empty, excess space within the piece but, having used my full hour, I decided to ignore my gut instinct to carry on and learn from my mistakes for my future pieces.
Finally, I really struggled with the hands and feet and creating them on such a small scale and decided to crop these off in the end. I find I can draw the basic shapes of them as a whole, but on a really small scale, I just cannot seem to get them right – perhaps it is because I am too heavy-handed (no pun intended!) or because I focus on the outline when I should be focussing on the tonal areas instead and allowing the digits to form naturally. I decided I needed to carry out some further practice with these things in a range of different sizes and poses.
Research Point: Foreshortening and the Human Form
Please click here to see the findings of my research.

The last one is fab!
LikeLiked by 1 person
These are great..well done!
LikeLiked by 1 person